NCNN+INT8+YOLOV4量化模型和实时推理
【GiantPandaCV导语】本文记录了作者使用NCNN量化YOLOV4模型并进行推理的全过程,过程比较详细,希望对想使用NCNN这一功能的读者有帮助。
一、前言
2021年5月7日,腾讯优图实验室正式推出了ncnn新版本,这一版本的贡献毫无疑问,又是对arm系列的端侧推理一大推动,先剖出nihui大佬博客上关于新版ncnn的优化点:
继续保持优秀的接口稳定性和兼容性
- API接口完全不变
- 量化校准table完全不变
- int8模型量化流程完全不变(重点是这个!!!之前对tensorflow框架一直不感冒,很大一部分源于tensorflow每更新一次版本,就杀死一片上一版本的接口,可能上了2.0以后这种情况好了很多,不过依旧训练是torch用的更多)
ncnn int8量化工具(ncnn2table)新特性
- 支持 kl aciq easyquant 三种量化策略
- 支持多输入的模型量化
- 支持RGB/RGBA/BGR/BGRA/GRAY输入的模型量化
- 大幅改善多线程效率
- 离线进行(反量化-激活-量化)->(requantize)融合,实现端到端量化推理
更多详情大家可以去看下nihui大佬的博客:https://zhuanlan.zhihu.com/p/370689914
二、新版ncnn的int8量化初探
趁着这股热风,赶紧试下新版ncnn量化版int8(更重要的原因是月底要中期答辩了,毕设还没搞完,赶紧跑跑大佬的库,顺带嫖一波)
2.1 安装编译ncnn
话不多说,在跑库前先安装编译好需要的环境,安装和编译过程可以看我的另一条博客:
https://zhuanlan.zhihu.com/p/368653551
2.2 yolov4-tiny量化int8
- 在量化前,先不要着急,我们先看看ncnn的wiki,看下量化前需要做什么工作:
https//github.com/Tencent/ncnn/wiki/quantized-int8-inference
wiki中:为了支持int8模型在移动设备上的部署,我们提供了通用的训练后量化工具,可以将float32模型转换为int8模型。
也就是说,在进行量化前,我们需要yolov4-tiny.bin和yolov4-tiny.param这两个权重文件,因为想快速测试int8版本的性能,这里就不把yolov4-tiny.weights转yolov4-tiny.bin和yolov4-tiny.param的步骤写出来了,大家上model.zoo去嫖下这两个opt文件,地址:https://github.com/nihui/ncnn-assets/tree/master/models
- 接着,按照步骤使用编译好的ncnn对两个模型进行优化:
./ncnnoptimize yolov4-tiny.param yolov4-tiny.bin yolov4-tiny-opt.param yolov4-tiny.bin 0
如果是直接上model.zoo下的两个opt文件,可以跳过这一步。
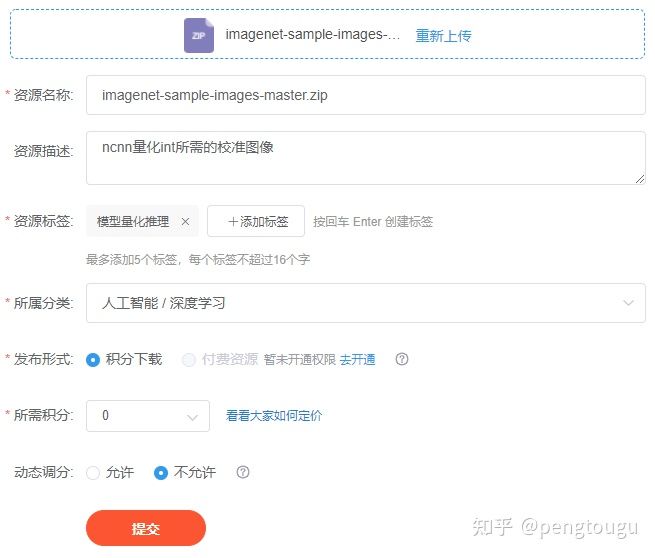
- 下载校准表图像
先下载官方给出的1000张ImageNet图像,很多同学没有梯子,下载慢,可以用下这个链接:
https://download.csdn.net/download/weixin_45829462/18704213
这里给大家设置的是免费下载,如果后续被官方修改了下载积分,那就么得办法啦(好人的微笑.jpg)
- 制作校准表文件
linux下,切换到和images同个文件夹的根目录下,直接
find images/ -type f > imagelist.txt
windows下,打开Git Bash(没有的同学自行百度安装,这个工具是真的好用),切换到切换到和images同个文件夹的根目录下,也是直接上面的命令行:
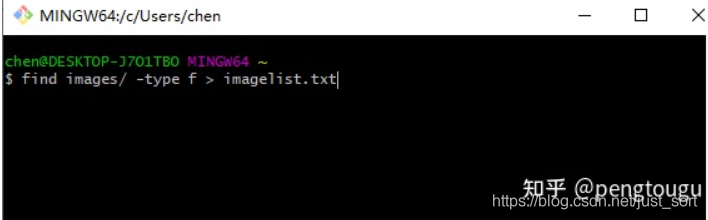
生成所需的list.txt列表,格式如下:

接着继续输入命令:
./ncnn2table yolov4-tiny-opt.param yolov4-tiny-opt.bin imagelist.txt yolov4-tiny.table mean=[104,117,123] norm=[0.017,0.017,0.017] shape=[224,224,3] pixel=BGR thread=8 method=kl
其中,上述所包含变量含义如下:
mean平均值和norm范数是你传递给Mat::substract_mean_normalize()的值,shape形状是模型的输入图片形状 pixel是模型的像素格式,图像像素将在Extractor::input()之前转换为这种类型 thread线程是可用于并行推理的CPU线程数(这个要根据自己电脑或者板子的性能自己定义) 量化方法是训练后量化算法,目前支持kl和aciq
- 量化模型
./ncnn2int8 yolov4-tiny-opt.param yolov4-tiny-opt.bin yolov4-tiny-int8.param yolov4-tiny-int8.bin yolov4-tiny.table
直接一步走,所有量化的工具在ncnn\build-vs2019\tools\quantize文件夹下
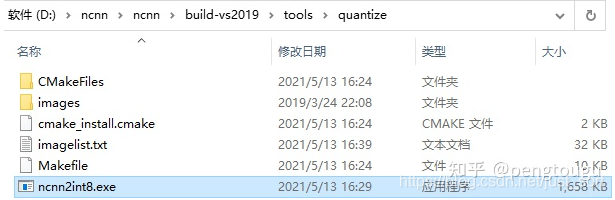
找不到的读者请看下自己编译过程是不是有误,正常编译下是会有这些量化文件的
运行成功后会生成两个int8的文件,分别是:

对比一下原来的两个opt模型,小了整整一倍!
三、新版ncnn的int8量化再探
量化出了int8模型仅仅是成功了一半,有模型但是内部参数全都错乱的情况也不是没见过。。。

- 调用int8模型进行推理
打开vs2019,建立新的工程,配置的步骤我在上一篇博客已经详细说过了,再狗头翻出来祭给大家:
https://zhuanlan.zhihu.com/p/368653551
大家直接去ncnn\examples文件夹下copy一下yolov4.cpp的代码(一个字!嫖!)
但是我在这里却遇到了点问题,因为一直搞不懂大佬主函数写的传参是什么,在昨晚复习完教资后搞到了好晚。。。
int main(int argc, char** argv)
{
    cv::Mat frame;
    std::vector<Object> objects;
    cv::VideoCapture cap;
    ncnn::Net yolov4;
    const char* devicepath;
    int target_size = 0;
    int is_streaming = 0;

    if (argc < 2)
    {
        fprintf(stderr, "Usage: %s [v4l input device or image]\n", argv[0]);
        return -1;
    }

    devicepath = argv[1];

#ifdef NCNN_PROFILING
    double t_load_start = ncnn::get_current_time();
#endif
    int ret = init_yolov4(&yolov4, &target_size); //We load model and param first!
    if (ret != 0)
    {
        fprintf(stderr, "Failed to load model or param, error %d", ret);
        return -1;
    }

#ifdef NCNN_PROFILING
    double t_load_end = ncnn::get_current_time();
    fprintf(stdout, "NCNN Init time %.02lfms\n", t_load_end - t_load_start);

#endif
    if (strstr(devicepath, "/dev/video") == NULL)
    {
        frame = cv::imread(argv[1], 1);
        if (frame.empty())
        {
            fprintf(stderr, "Failed to read image %s.\n", argv[1]);
            return -1;
        }
    }
    else
    {
        cap.open(devicepath);

        if (!cap.isOpened())
        {
            fprintf(stderr, "Failed to open %s", devicepath);
            return -1;
        }
        cap >> frame;
        if (frame.empty())
        {
            fprintf(stderr, "Failed to read from device %s.\n", devicepath);
            return -1;
        }
        is_streaming = 1;
    }
    while (1)
    {
        if (is_streaming)
        {
#ifdef NCNN_PROFILING
            double t_capture_start = ncnn::get_current_time();
#endif
            cap >> frame;

#ifdef NCNN_PROFILING
            double t_capture_end = ncnn::get_current_time();
            fprintf(stdout, "NCNN OpenCV capture time %.02lfms\n", t_capture_end - t_capture_start);
#endif
            if (frame.empty())
            {
                fprintf(stderr, "OpenCV Failed to Capture from device %s\n", devicepath);
                return -1;
            }
        }

#ifdef NCNN_PROFILING
        double t_detect_start = ncnn::get_current_time();
#endif
        detect_yolov4(frame, objects, target_size, &yolov4); //Create an extractor and run detection

#ifdef NCNN_PROFILING
        double t_detect_end = ncnn::get_current_time();
        fprintf(stdout, "NCNN detection time %.02lfms\n", t_detect_end - t_detect_start);
#endif
#ifdef NCNN_PROFILING
        double t_draw_start = ncnn::get_current_time();
#endif
        draw_objects(frame, objects, is_streaming); //Draw detection results on opencv image

#ifdef NCNN_PROFILING
        double t_draw_end = ncnn::get_current_time();
        fprintf(stdout, "NCNN OpenCV draw result time %.02lfms\n", t_draw_end - t_draw_start);
#endif
        if (!is_streaming)
        {   //If it is a still image, exit!
            return 0;
        }
    }
    return 0;
}
果然大佬就是大佬,写的代码高深莫测,我只是一个小白,好难

靠,第二天直接不看了,重新写了一个main函数,调用大佬写的那几个function:
int main(int argc, char** argv)
{
    cv::Mat frame;
    std::vector<Object> objects;
    cv::VideoCapture cap;
    ncnn::Net yolov4;
    const char* devicepath;
    int target_size = 160;
    int is_streaming = 0;
    /*
    const char* imagepath = "E:/ncnn/yolov5/person.jpg";

    cv::Mat m = cv::imread(imagepath, 1);
    if (m.empty())
    {
        fprintf(stderr, "cv::imread %s failed\n", imagepath);
        return -1;
    }

    double start = GetTickCount();
    std::vector<Object> objects;
    detect_yolov5(m, objects);
    double end = GetTickCount();
    fprintf(stderr, "cost time:  %.5f\n ms", (end - start)/1000);

    draw_objects(m, objects);

    */
    int ret = init_yolov4(&yolov4, &target_size); //We load model and param first!
    if (ret != 0)
    {
        fprintf(stderr, "Failed to load model or param, error %d", ret);
        return -1;
    }

    cv::VideoCapture capture;
    capture.open(0);  //修改这个参数可以选择打开想要用的摄像头

    //cv::Mat frame;
    while (true)
    {
        capture >> frame;
        cv::Mat m = frame;
        double start = GetTickCount();
        std::vector<Object> objects;
        detect_yolov4(frame, objects, 160, &yolov4);
        double end = GetTickCount();
        fprintf(stderr, "cost time:  %.5f ms \n", (end - start));
        // imshow("外接摄像头", m);  //remember, imshow() needs a window name for its first parameter
        draw_objects(m, objects, 8);

        if (cv::waitKey(30) >= 0)
            break;
    }

    return 0;
}
还有几点注意,大家在进行推理的时候
把fp16禁掉,不用了 换成int8推理 把线程改成你之前制作int8模型的那个线程 模型也替换掉
具体如下:

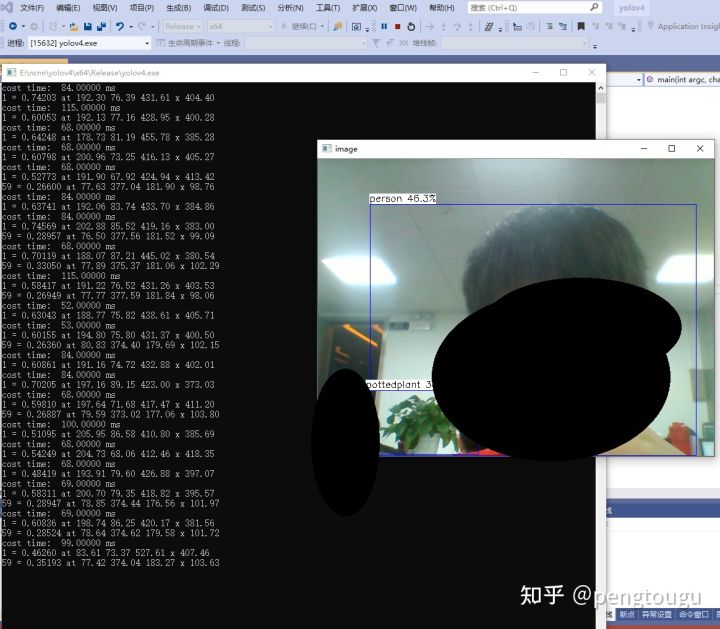
走到这里,就可以愉快的推理了
四、总结
说一下我的电脑配置,神舟笔记本K650D-i5,处理器InterCorei5-4210M,都是相对过时的老机器了,毕竟买了6年,性能也在下降。
跑库过程全程用cpu,为什么不用gpu?(问的好,2g显存老古董跑起来怕电脑炸了)
对比之前的fp16模型,明显在input_size相同的情况下快了40%-70%,且精度几乎没有什么损耗
总结来说,新版ncnn的int8量化推理确实是硬货,后续会尝试更多模型的int8推理,做对比实验给各位网友看
所有的文件和修改后的代码放在这个仓库里,欢迎大家白嫖:
https://github.com/pengtougu/ncnn-yolov4-int8(https://github.com/pengtougu/ncnn-yolov4-int8)
感兴趣的朋友可以git clone下载跑跑,即下即用(前提要安装好ncnn)~
欢迎关注GiantPandaCV, 在这里你将看到独家的深度学习分享,坚持原创,每天分享我们学习到的新鲜知识。( • ̀ω•́ )✧
有对文章相关的问题,或者想要加入交流群,欢迎添加BBuf微信:

本文总阅读量次